Sidebar
Table of Contents
What's New In Version 11
Text Animations
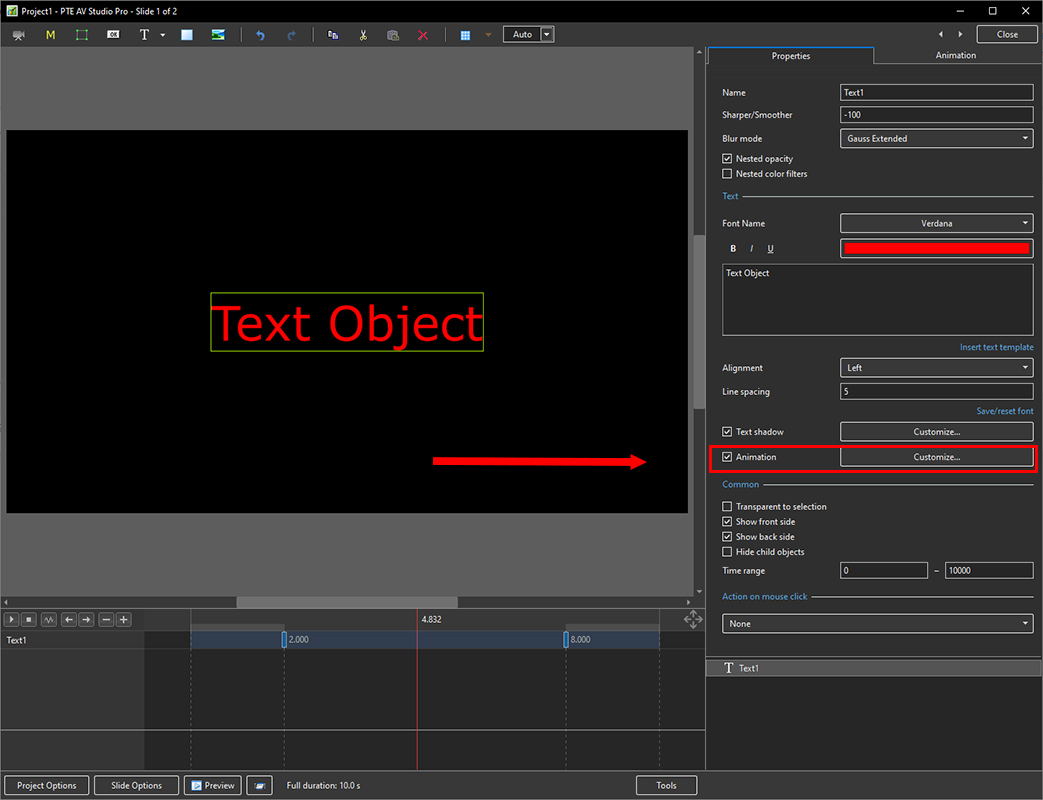
- Add a text object and click on Animation
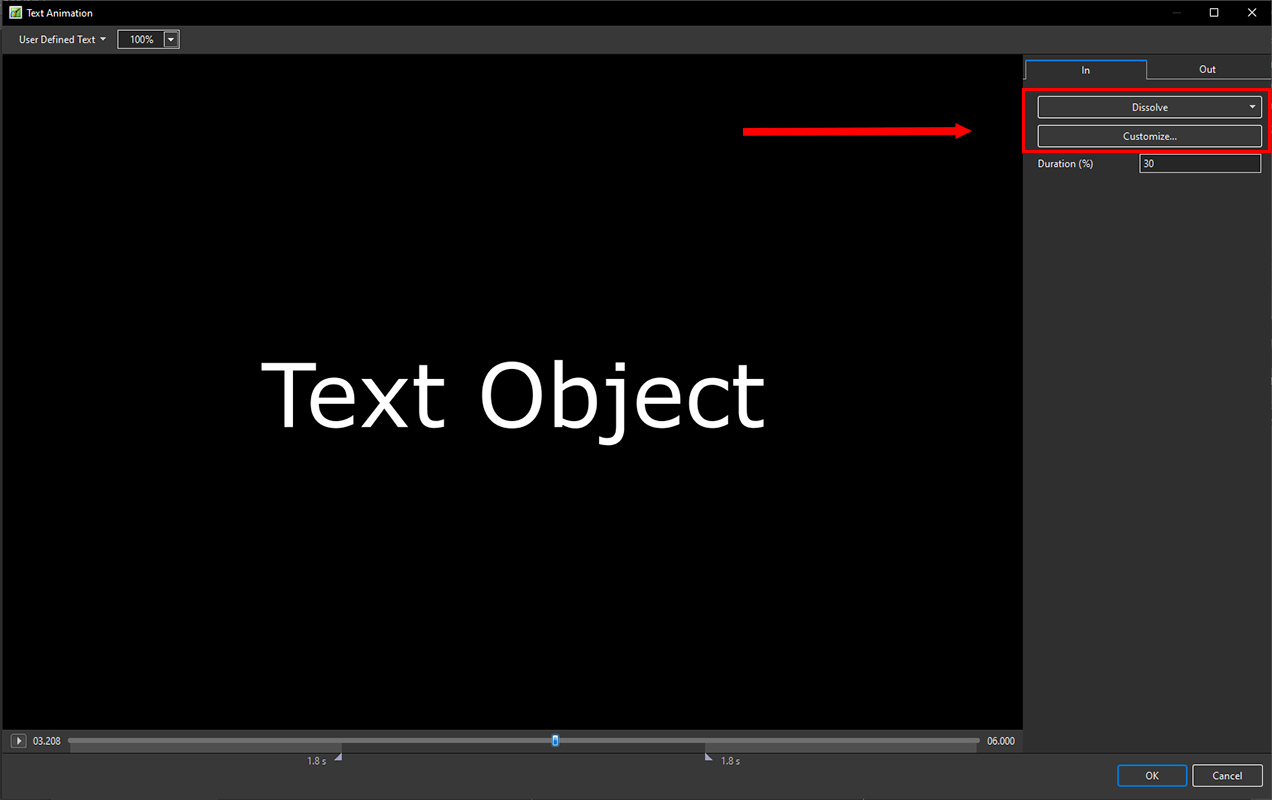
- Click on Customize
- Move the Cursor or press the Play Button to see the default effect for the “In” and “Out” Animations
- Click on “Dissolve” to see the available Preset Animations
- “Duration” shows the percentage of available time for the effect
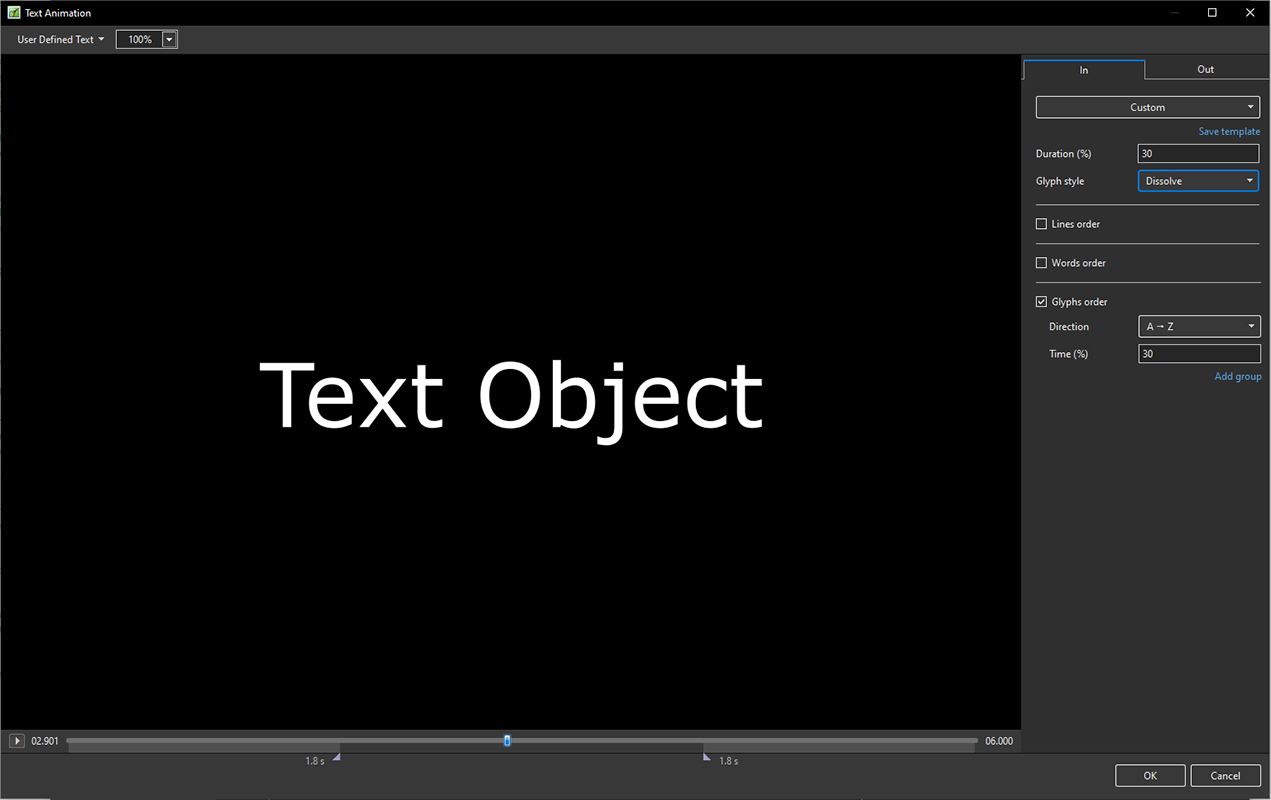
- Click on “Customize”
- Move the Cursor or press the Play Button to see the default effect for the “In” and “Out” Animations
- “Duration” shows the percentage of available time for the effect
- “Glyph Style” - select from Presets in dropdown menu
- Select from “Glyphs Order”, “Lines Order” or “Words Order”
- “Direction” - select preset from dropdown menu
- “Time (%)” - Varies the Intensity of the effect
- Click on “Out” tab
- The options are similar to the “In” Tab
- “User Defined Text” - Click on the text “User Defined Text” to see a dropdown menu with some options - “User Defines Text”, Sample Text 1, Sample Text 2 and Sample Text 3
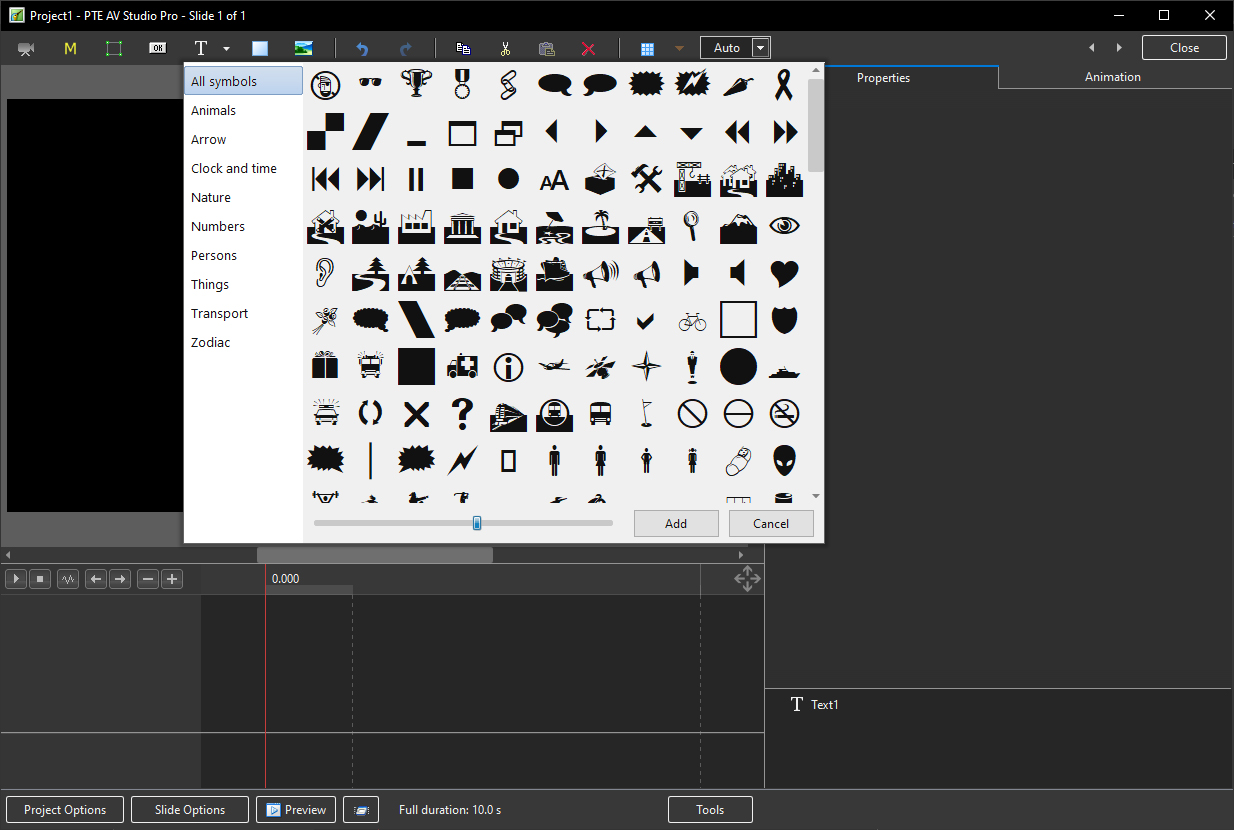
Add a Symbol (Vector Icon)
- Symbols can be scaled to any size without loss in quality
- The Colour of a Symbol can be changed
- The Shadow of a Symbol can be adjusted
- The Shadow of a Symbol can be adjusted
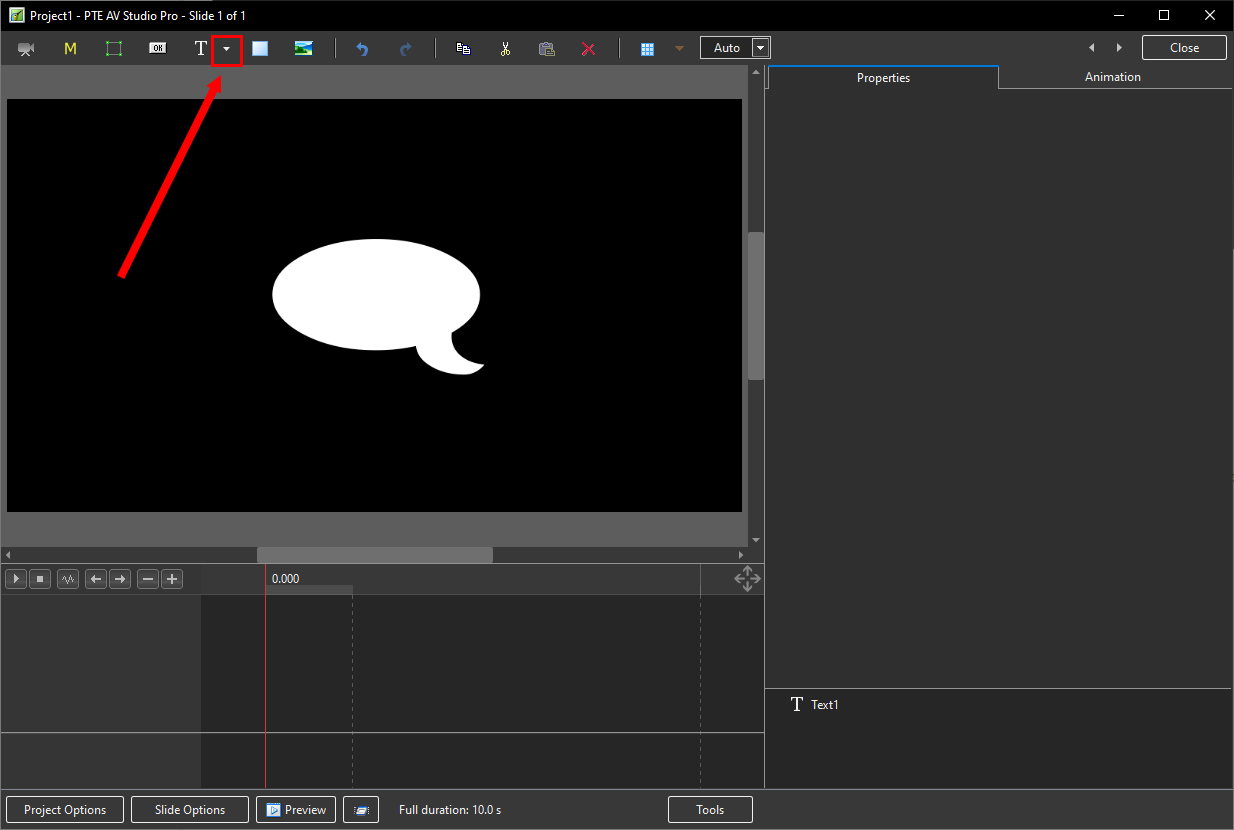
- In the Objects and Animation Editor Right click in a blank space and choose “Add > Symbol” (Ctrl 8) or click on the Icon next to the “T” for a dropdown Menu
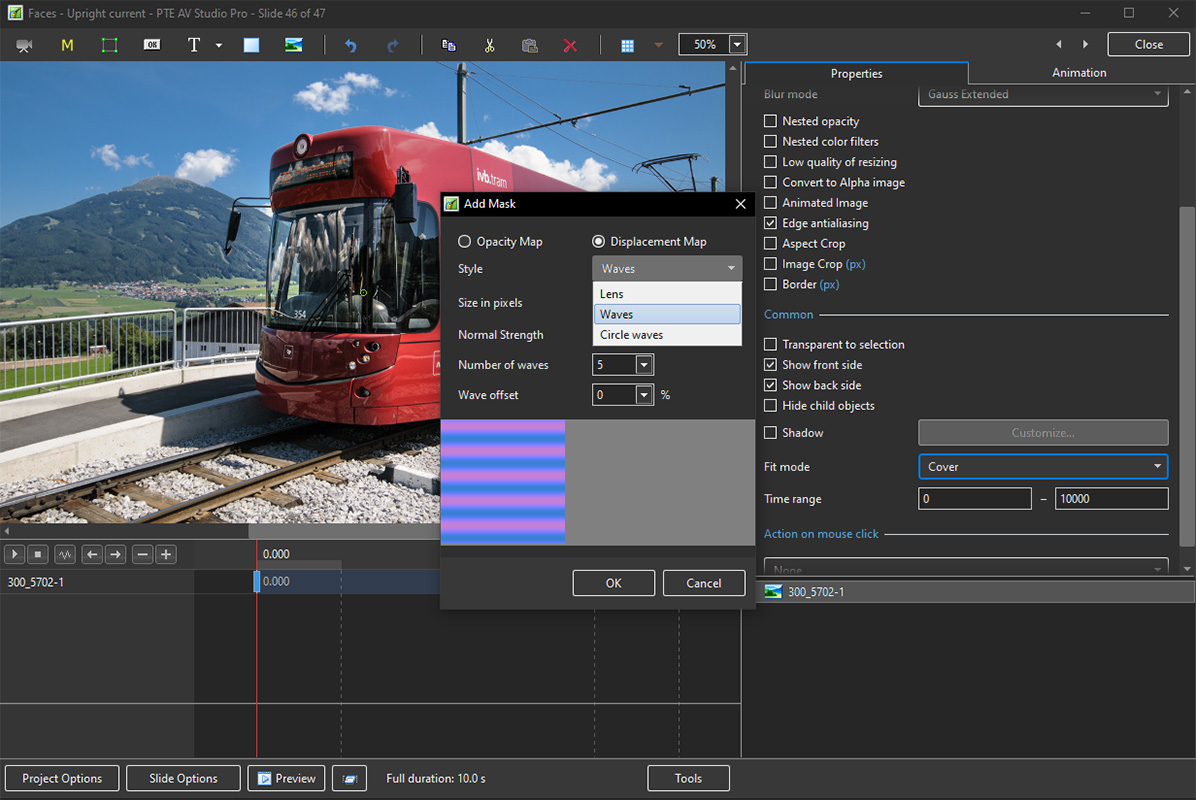
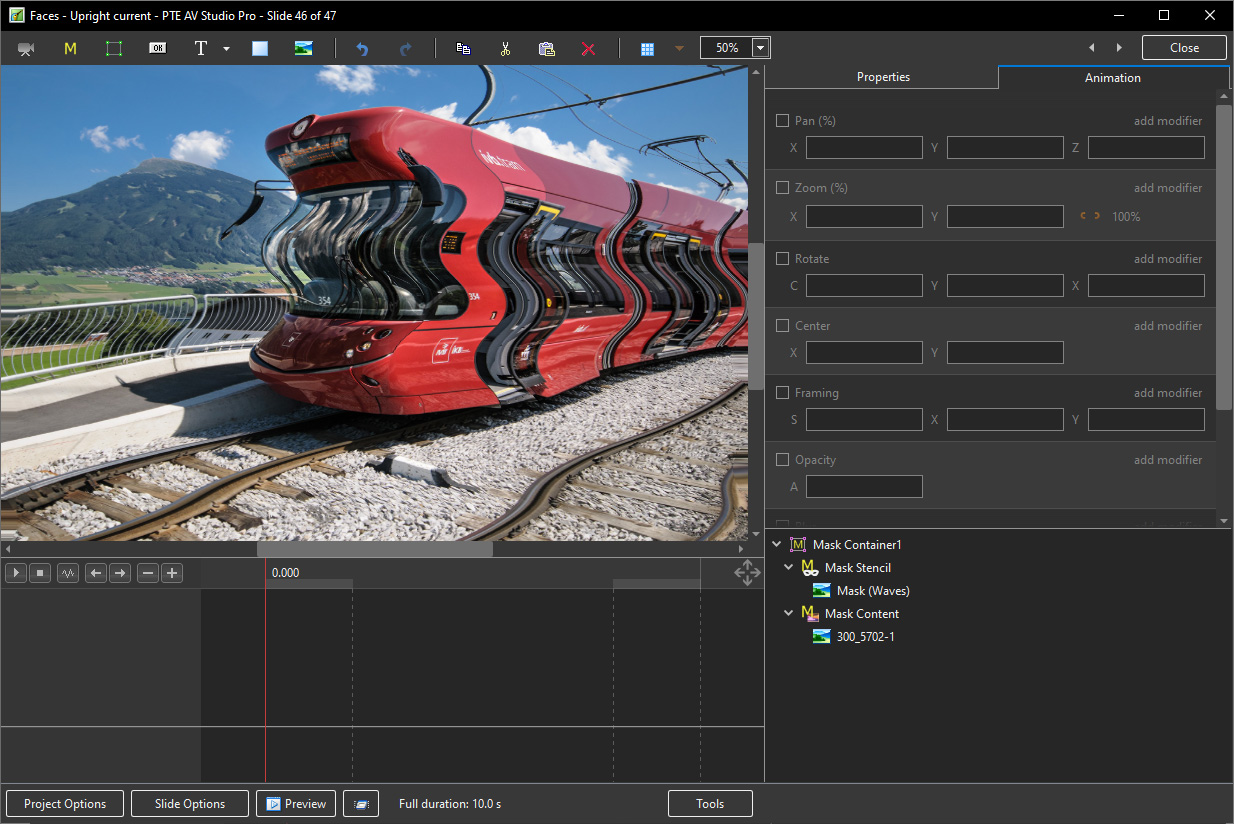
Displacement Map effect
- Pro Version ONLY
- Add a Mask Template
- Choose Displacement Map
- Choose an option from the Style dropdown menu
- Adjust other options to suit
- Click OK
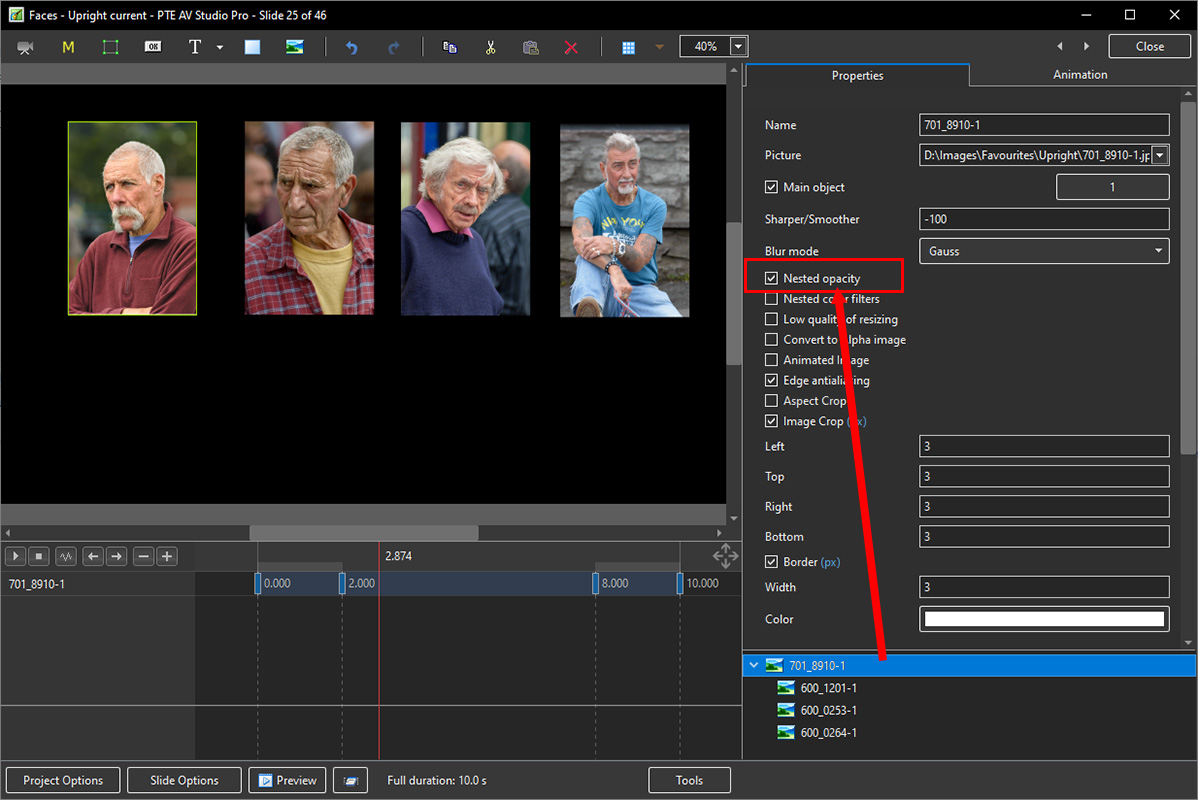
Nested opacity for child objects
- Nested Opacity for Child Objects is turned OFF by default
- See Objects and Animation / Properties Tab to turn ON
- When turned on the Opacity for all child objects is controlled by the opacity of the Parent Object
- Use Opacity in the Animation Tab
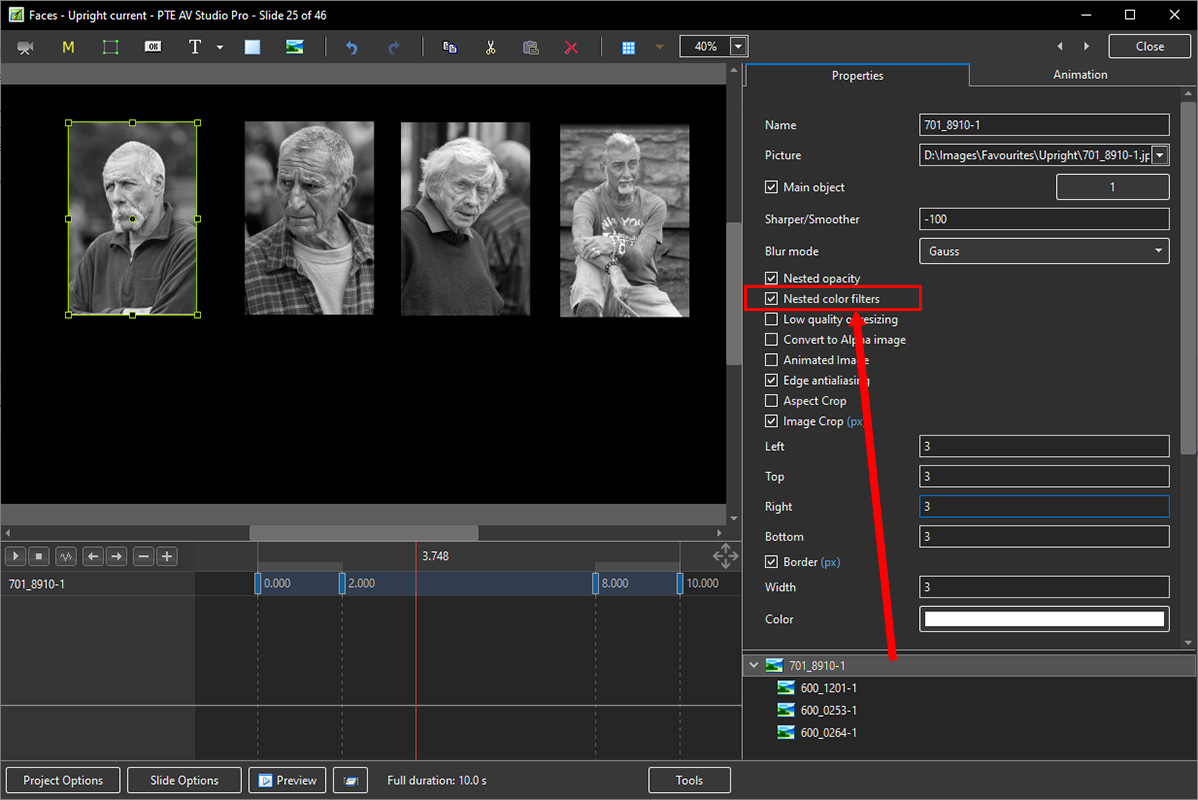
Nested colour filters for child objects
- Nested Colour Filters for Child Objects is turned OFF by default
- See Objects and Animation / Properties Tab to turn ON
- When turned on the Colour Filter Effect for all child objects is controlled by the Colour Filter Effect of the Parent Object
- Use Colour Correction in the Animation Tab
- Pro Version ONLY
Quick Style for slides
- Using a Quick Style you can immediately copy all objects with animations from one slide to another slide or slides
- Transition, synchronization and duration of a target slide will be untouched
- Main image file name also will remain original
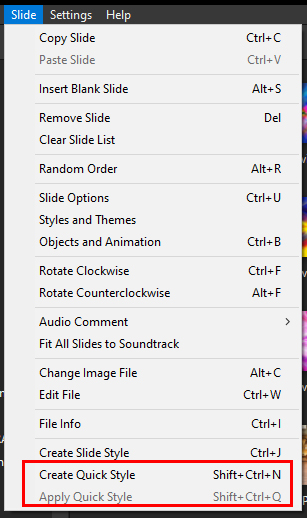
- See the Main menu > Slide > Create Quick Style (Shift Ctrl N) / Apply Quick Style (Shift Ctrl Q)
- Copy animation from one slide and apply to other slides
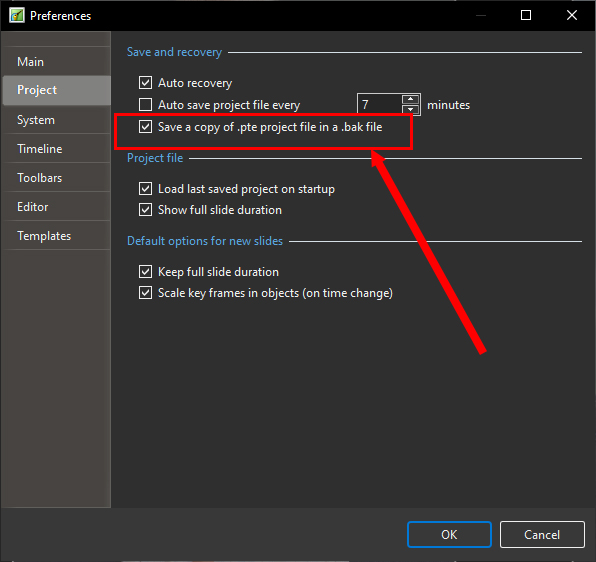
Save a copy of .pte project file in a .bak file
- Currently, it's not ticked by default.
- You'll always get a previous copy of .pte project file before last Save command in a .bak file. It's a renamed project file.
- In case of any problem with .pte project file, you always have a copy of a project from one previous step.
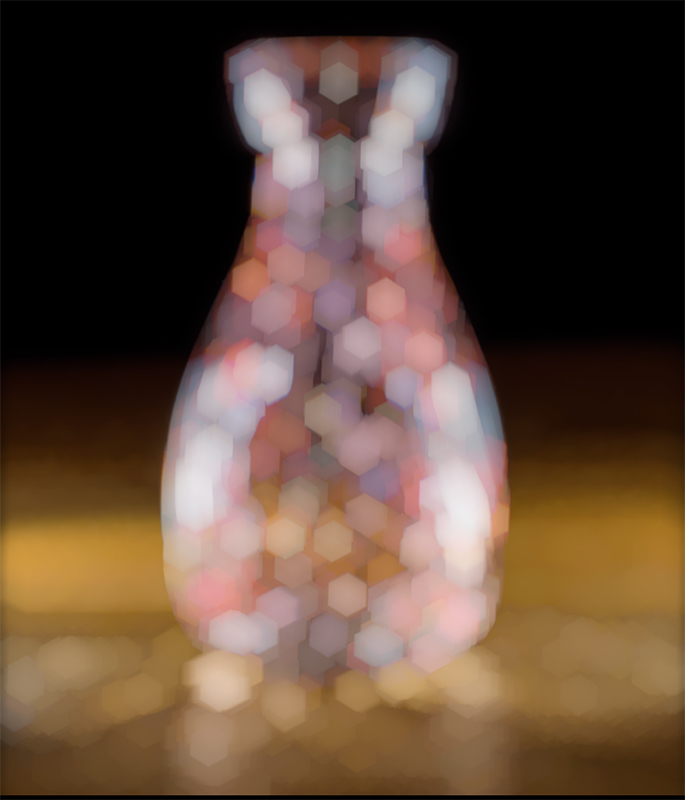
Blur with Bokeh
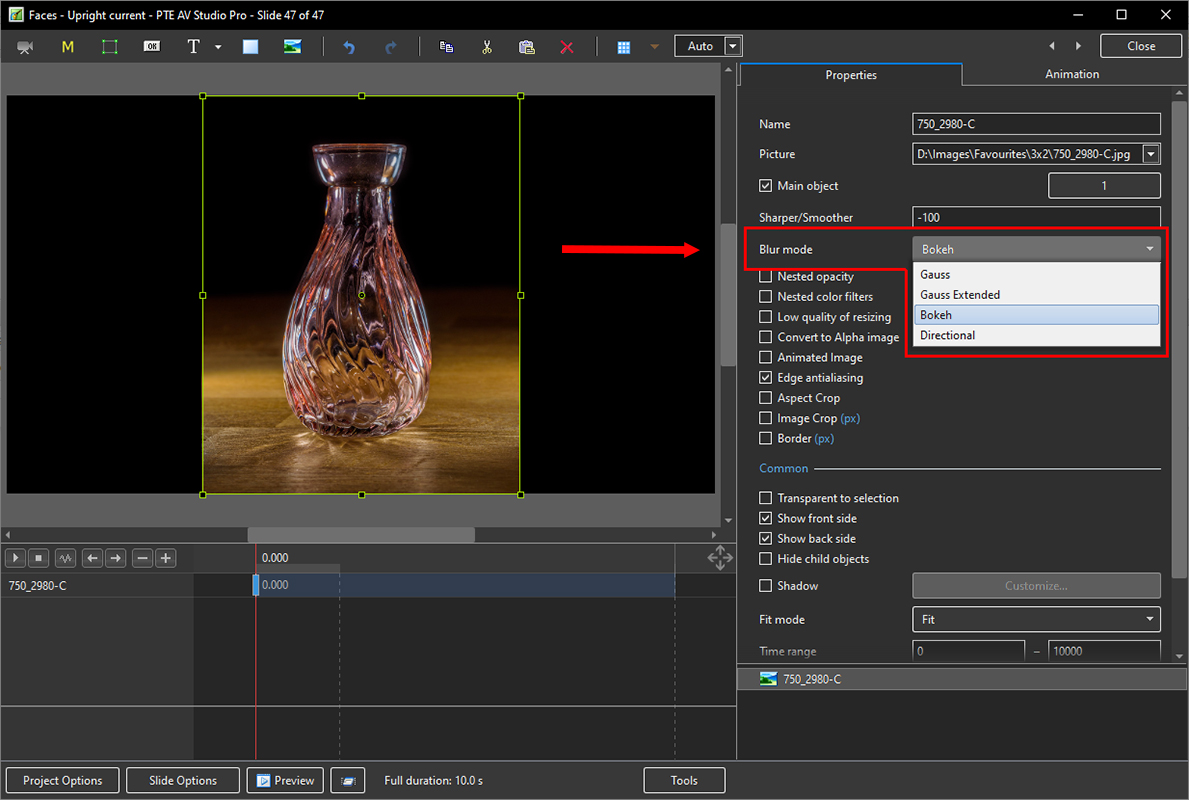
- In Objects and Animation, with the Object Highlighted
- In Properties Tab, choose “Blur Mode”
- In the dropdown menu choose “Bokeh”
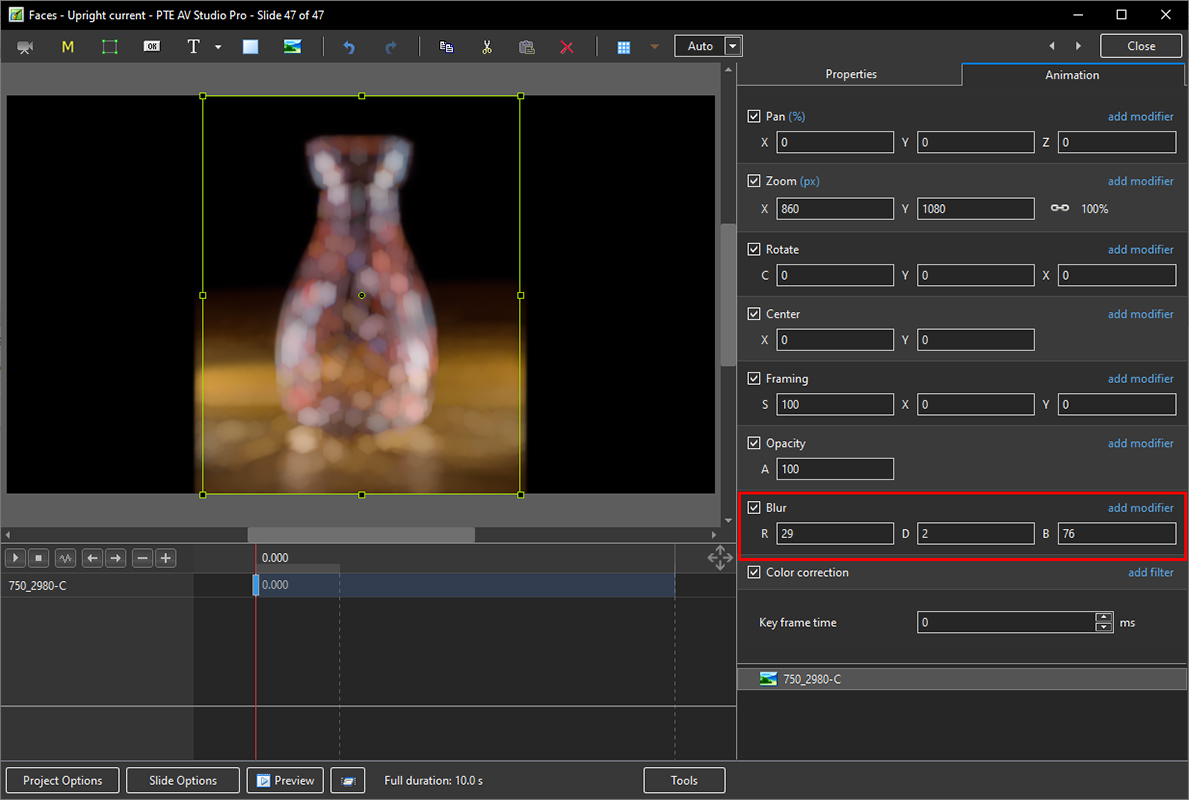
- In Animation Tab tick “Blur”
- R = Amount of Blur; D = Direction of Blur; B = Intensity of the Effect
Directional Blur effect
- In Objects and Animation, with the Object Highlighted
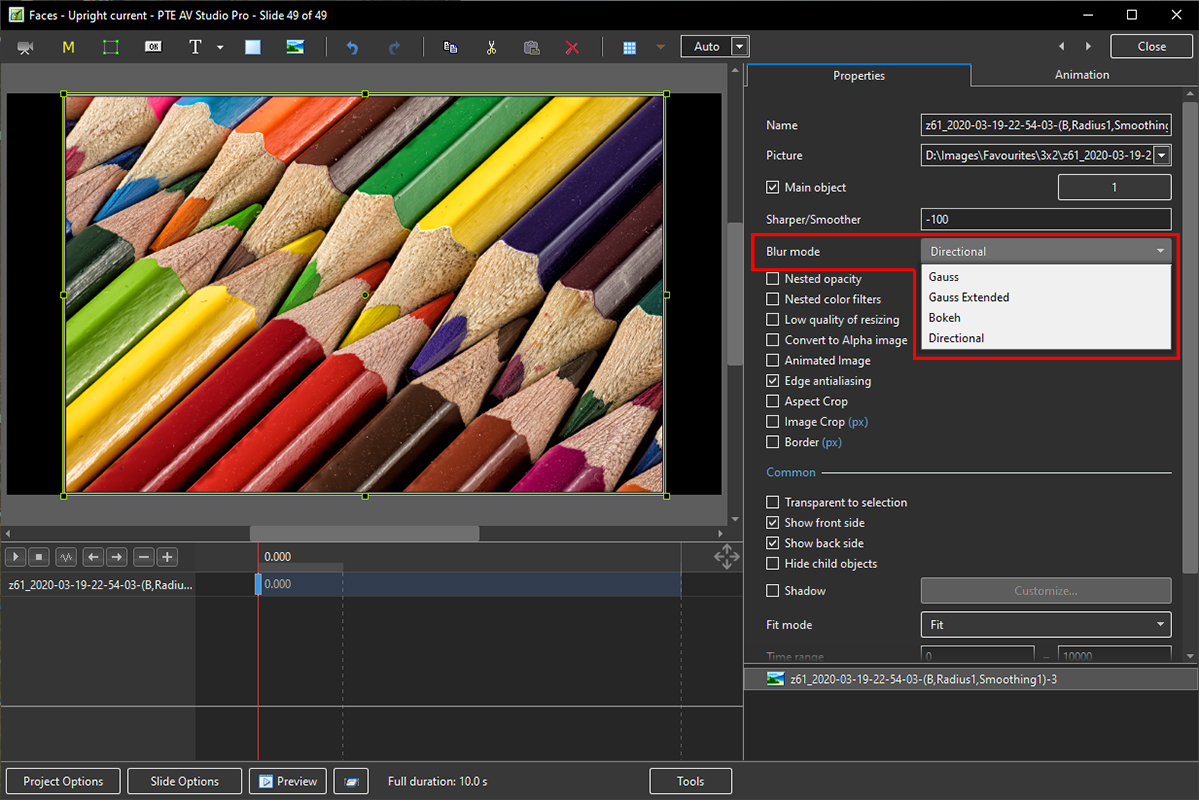
- In Properties Tab, choose “Blur Mode”
- In the dropdown menu choose “Directional”
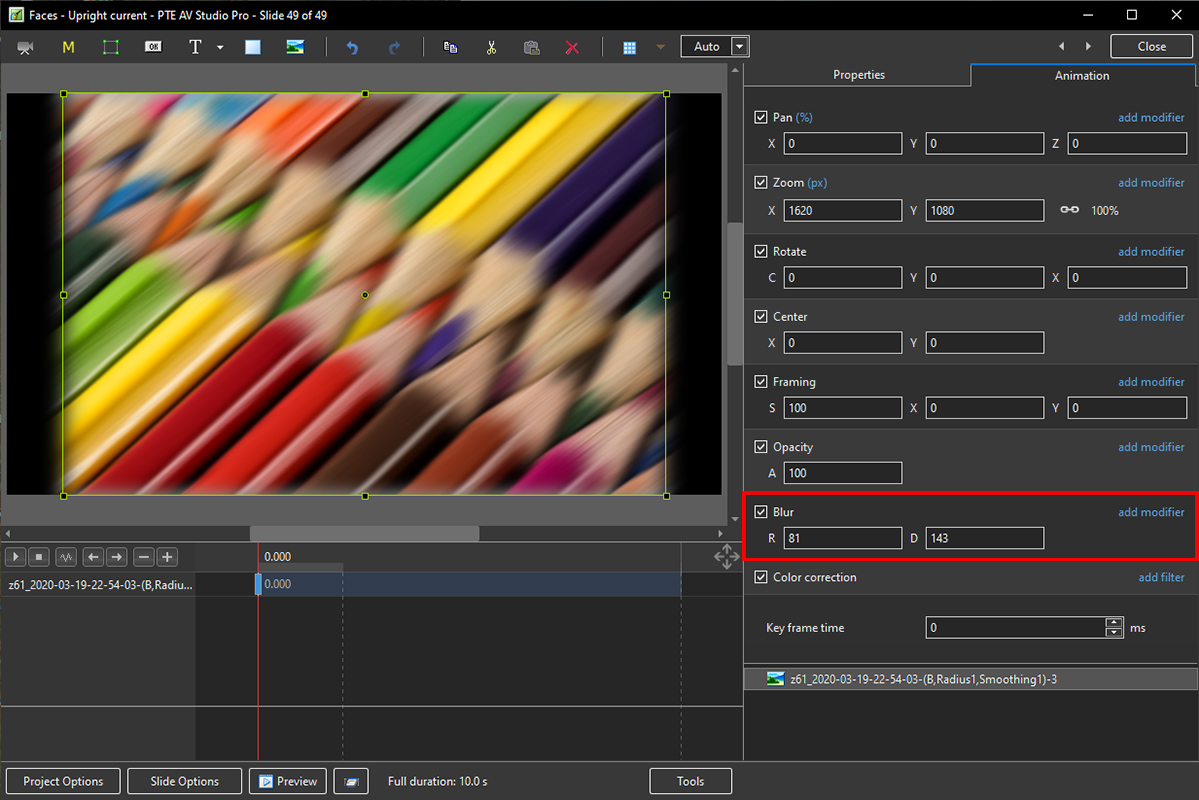
- In Animation Tab tick “Blur”
- R = Amount of Blur; D = Direction of Blur
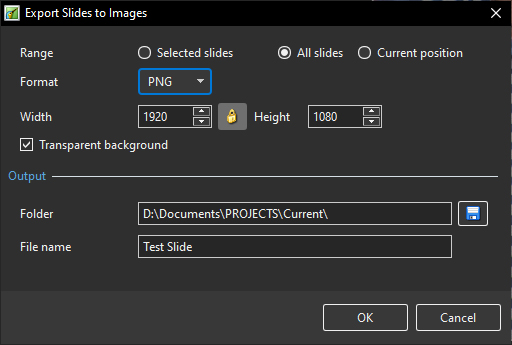
Export Slides to Images
- Choose Publish / Export Slides to Images from Main Menu
- Range - Choose Selected Slide(s); All Slides; Current Position (in Timeline)
- Format - Choose PNG or JPEG
- Size - Default is Screen Size in Pixels
- Transparent Background - Available for PNG
- Output - Choose Folder and File Name
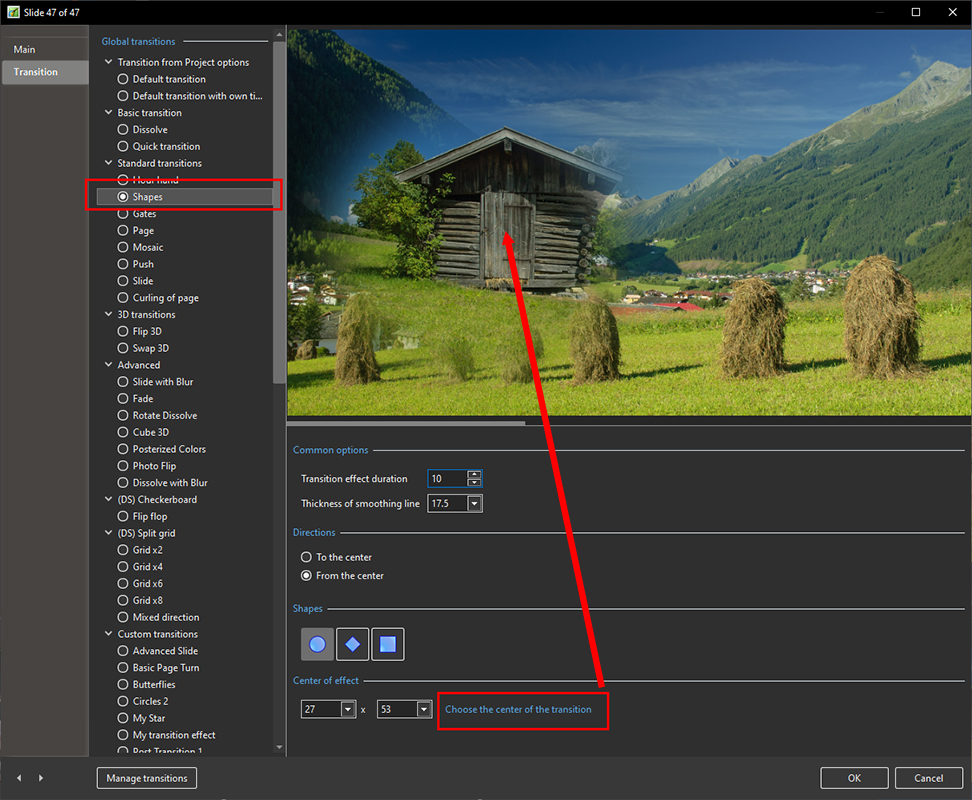
You can choose the centre of Shape transition with a mouse cursor using preview
* Click and HOLD the left mouse button on “Choose the centre of the Transition”
* Move the cursor to the position that you want as the Centre of the Transition
* Release the Mouse Button
Video encoding works faster on 20% when using a Hardware acceleration option with NVIDIA graphics
Text Template for Multiple Images on same Slide
* Add multiple Images to a slide as Main Images with Main Image Indexes * Add a Text Template to each * In the Text Box for Main Image 2 change the text to “MainImg2” a
Export Slides to Images
- Choose Publish / Export Slides to Images from Main Menu
- Range - Choose Selected Slide(s); All Slides; Current Position (in Timeline)
- Format - Choose PNG or JPEG
- Size - Default is Screen Size in Pixels
- Transparent Background - Available for PNG
- Output - Choose Folder and File Name
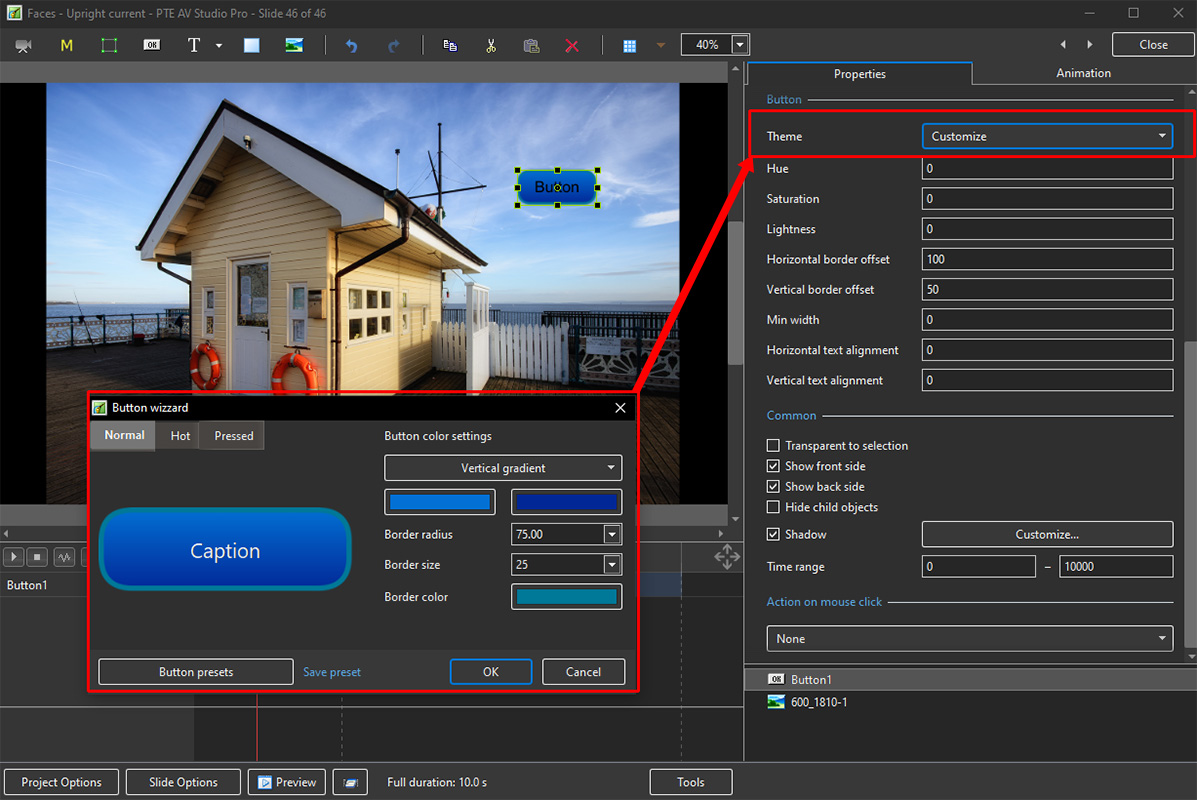
Customise Buttons
- In Objects & Animation, with the Button selected, click on “Theme” in the Button Properties
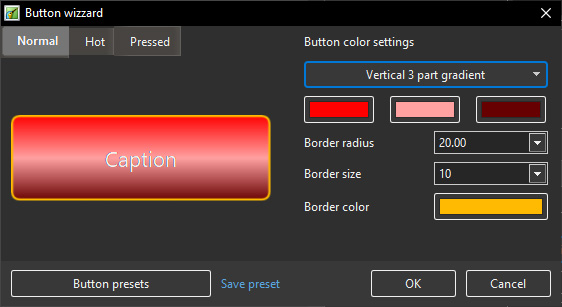
- In the “Button Wizard”:
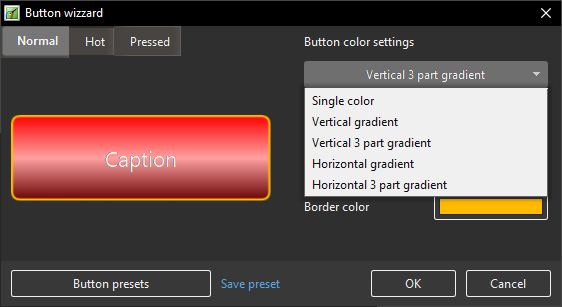
- You can select different Themes for Normal, Hot (Hover Mouse) and Pressed (click with Mouse)
- Select Solid Colour or Gradient Type:
- You can choose the Colours, Border Radius, Border Size and Border Colour
- You can choose from a list of Presets and create your own Preset
Quick Style for slides
- Copy animation from one slide and apply to other slides.
New slide styles
- Collage,
- Photo Story,
- Album 3D,
- Gallery,
- Stack of 5 Pictures,
- 4 Pictures,
- Portrait - Zoom In/Out,
- Border - Portrait Zoom In/Out
- Circles
New Transitions
- Circle Waves
- Waves with Dissolve
- Dissolve with Blur
- Photo Flip
Improved Styles and Themes window
- It’s possible to re-arrange images, add or remove images for a style.
- Sound for a preview in Convert/Trim Video Clip and also in Adjust Time Range for a video clip object.
Save a copy of .pte project file in a .bak file
* Currently, it's not ticked by default.
* You'll always get a previous copy of .pte project file before last Save command in a .bak file. It's a renamed project file.
* In case of any problem with .pte project file, you always have a copy of a project from one previous step.
Smooth Move
- The Smooth Move Modifier simulates a Bezier Curve
- Pro Version ONLY
Improved Styles and Themes window
- It’s possible to re-arrange images, add or remove images for a style.
- Sound for a preview in Convert/Trim Video Clip and also in Adjust Time Range for a video clip object.
en-us/11.0/v11_wn/main.txt · Last modified: 2023/02/16 11:08 by davegee
Except where otherwise noted, content on this wiki is licensed under the following license: CC Attribution-Noncommercial-Share Alike 4.0 International
