Sidebar
This is an old revision of the document!
Table of Contents
Temp
The Animation Tab is shown below.This provides the various adjustments and parameters to control animation of objects.
- For Pan and Rotate, adjustments can be made in three planes
- X,Y and Z for Pan
- C,Y and X for Rotate
- These adjustments replace the 3D parameters provided in Version 8.
- A new adjustment called Framing is provided (see Framing)
- The Color Correction parameters have been expanded in Version 9 (Color Correction)
- The “Key Frame Time” box shows the time (in milliseconds) of the selected Key Frame
Parameter Controls
Display Mode for Pan and Zoom
Click on the “%” sign or the “100%” sign:
- “%” = Percentage Mode
- “px” = Pixels Mode
- “pt” = Original Points Mode
- “100%” = Full Height of Project Screen
- “Original Pixels” = The Original Pixel Size of the Image
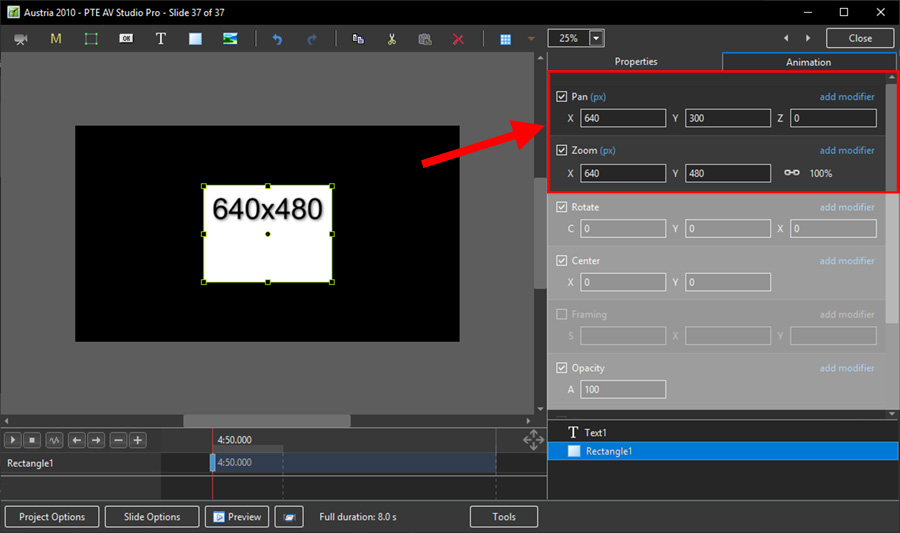
The Illustration below shows a 640×480 rectangle at Original Size in a 1920×1080 Project
- In Percentage Mode:
- The values for “X” and “Y” Pan are calculated for the Centre of the Object/Rectangle with respect to the Centre of the Slide
- The value of the Zoom Parameter is the percentage of the Full Height of the Project Screen (in this case 1080 pixels)
- 480/1080= 0.44444444444 = 44.44444444%
- In Pixels Mode:
- The values for “X” and “Y” Pan are calculated for the Top Left Corner of the Object/Rectangle with respect to the Top Left Corner of the Slide
- The value of the Zoom Parameter is the Pixel Size of the Object/Rectangle
- In Points Mode
The Centre Control
- The “CENTRE” Control can be used to move the CENTRE or “Point of Rotation” of an Object as shown below:
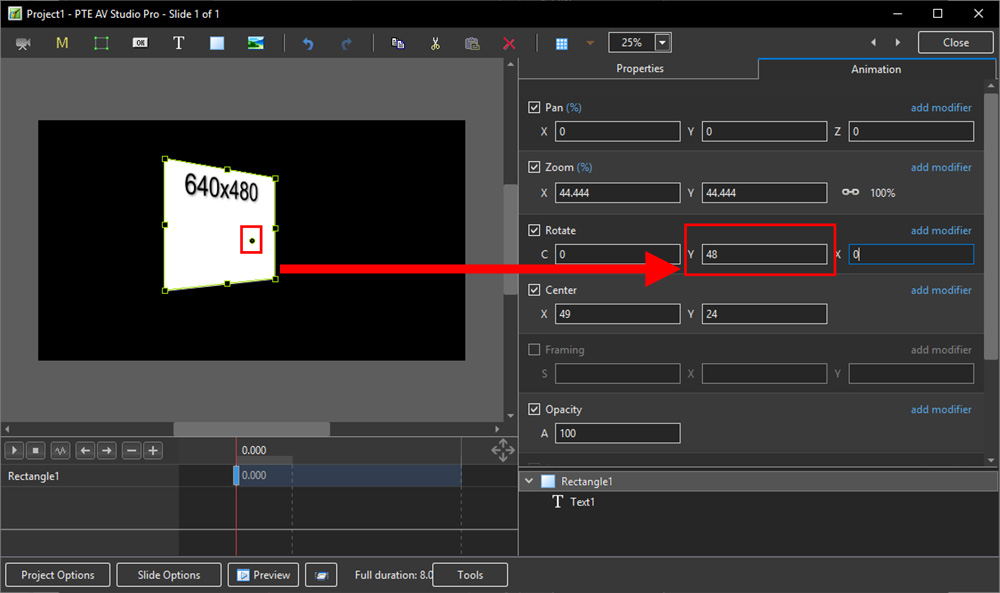
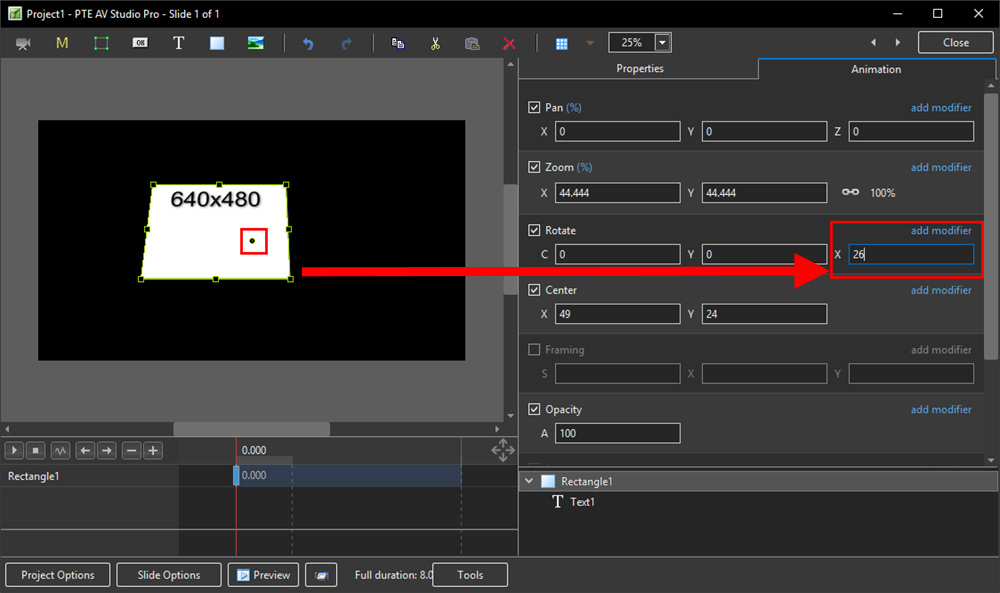
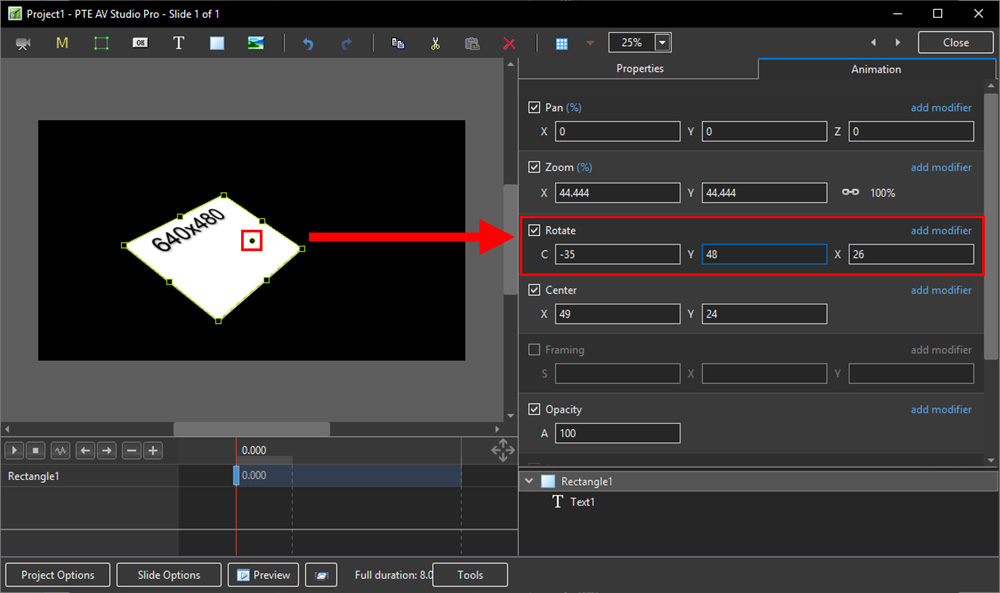
The Rotate Control
- The “Rotate C” Control will rotate an Object about its Centre Point in the same plane as the screen:
- The “Rotate Y” Control will rotate an Object about its Centre Point in 3 Dimensions Horizontally:
- The “Rotate X” Control will rotate an Object about its Centre Point in 3 Dimensions Vertically:
- The “C”, “Y” and “X” Rotate Controls can be used simultaneously:
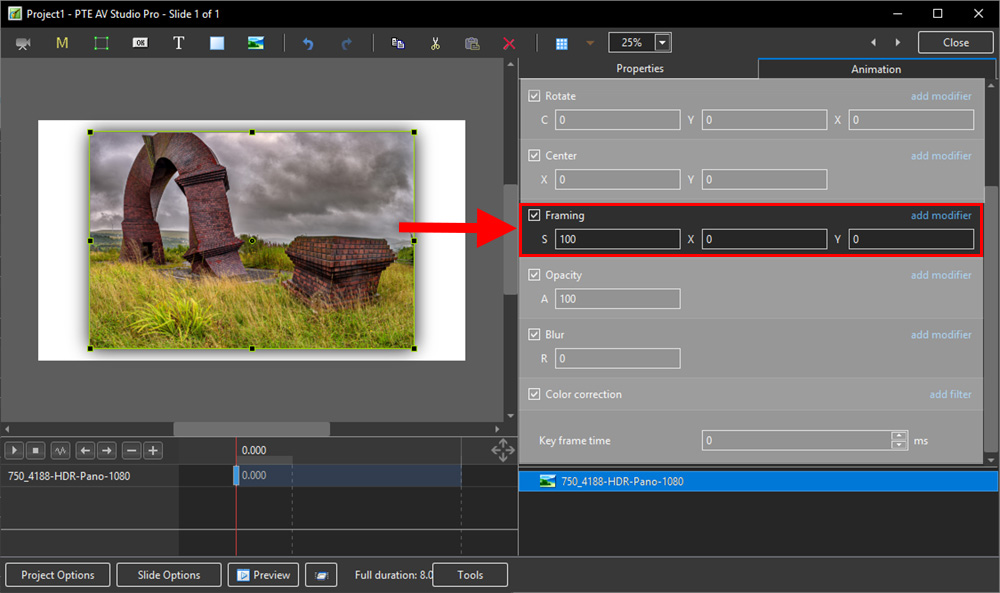
Framing
- Framing can be used to Pan and/or Zoom an Image within a Frame without modifying the frame itself
- Framing can also be used to adjust an Aspect Ratio mismatch
- In the example below a 4:3 image is shown within a 3:2 frame at 90% of full screen in a 16:9 Project.
- In the default 100% Scaling (S) the 4:3 Image has been “cut off” at the top and bottom of the Image and “Fits” the Width of the 3:2 Frame.
- By adjusting the “S”, “X” and “Y” Controls a “Best Fit” composition can be achieved
- Further Panning and Zooming is possible
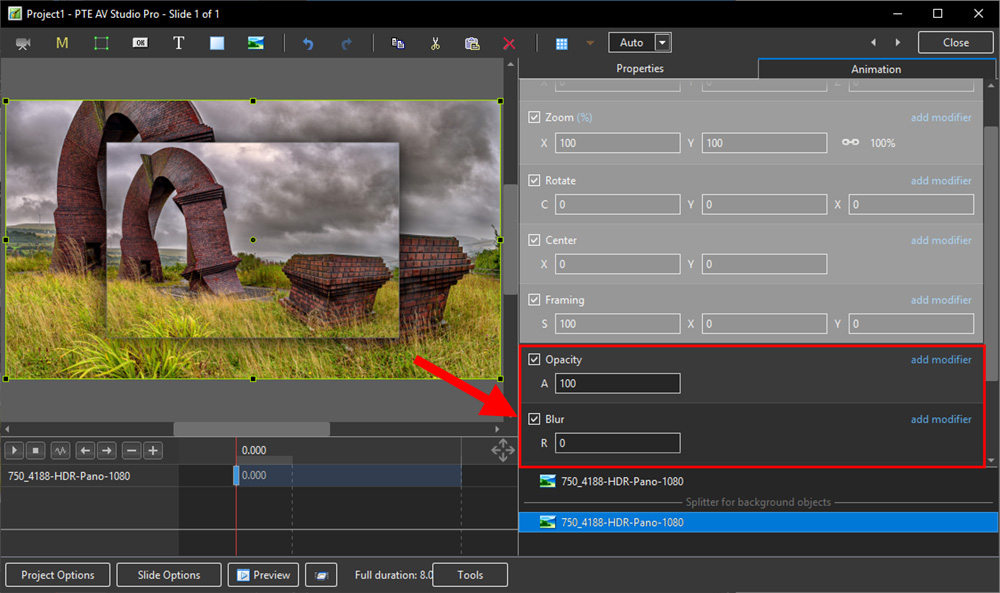
Opacity and Blur
- The Illustration shows Main Image used as a Background Image at 100% Opacity and Zero Blur
- The following Illustration shows the same Background Image with reduced Opacity and a little Blur
Modifiers
- Modifiers can be applied to an Animation of an Object / Image between two Key Frames
- The Modifier is applied to the first Key Fame of a pair of Key Frames defining the nimation
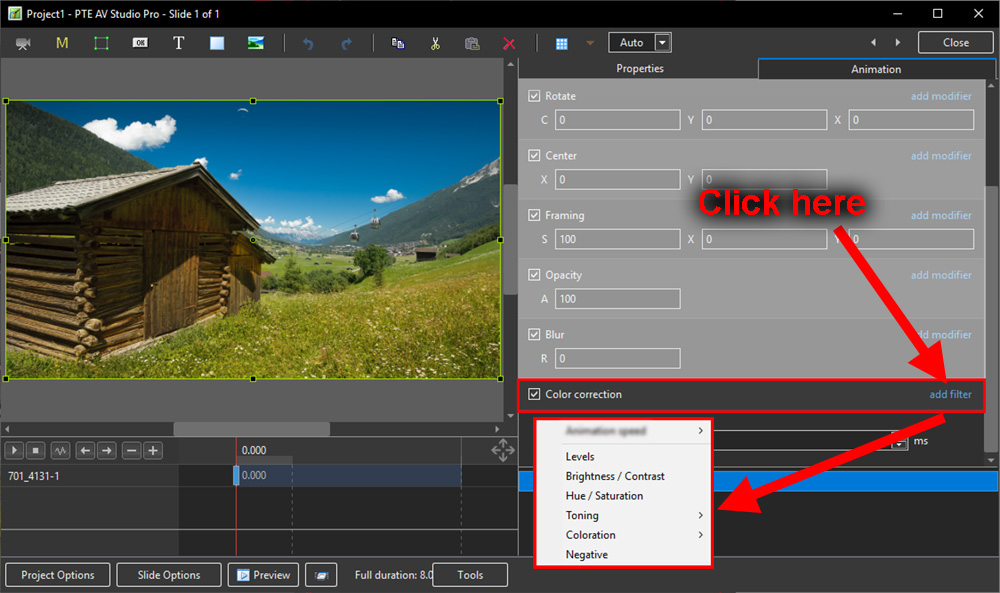
Colour Correction
- Click on “Add Filter” to display a list of available Colour Correction Adjustments:
The available Adjustments are:
- Levels
- Brightness / Contrast
- Hue / Saturation
- Toning
- Colouration
- Negative
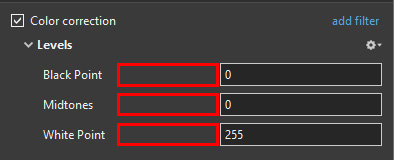
Levels
- The Adjustments:
- Click and drag within the area outlined to the Left and / or Right to change the value of the adjustment
- Values can be entered directly via the keyboard
- Increasing the Black Point and decreasing he White Point will apply Contrast to the Object / Image
- Increasing / Decreasing the Midtones will Lighten / Darken the Object / Image
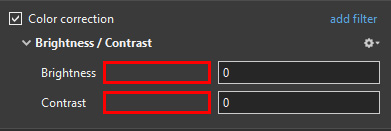
Brightness / Contrast
- The Adjustments:
- Click and drag within the area outlined to the Left and / or Right to change the value of the adjustment
- Values can be entered directly via the keyboard
- Drag to the Left / Right to Decrease / Increase Brightness
- Drag to the Left / Right to Decrease / Increase Contrast
Hue / Saturation
- The Adjustments:
- Click and drag within the area outlined to the Left and / or Right to change the value of the adjustment
- Values can be entered directly via the keyboard
- Drag to the Left / Right to change the Hue
- Drag to the Left / Right to Desaturate / Saturate the Object / Image
- Drag to the Left / Right to Darken / Lighten the Object / Image
Toning
- The Adjustments:
- Choose from Grayscale, Sepia or Cyan
- Click and drag within the area outlined to the Left and / or Right to change the value of the adjustment
- Values can be entered directly via the keyboard
- Click on the Colour /Grayscale to open the Choose Colour Box and change the Tone
- Drag the Amount Slider to the Left to Decrease the Effect
Colouration
- The Adjustments:
- Choose from Red, Green or Blue
- Click and drag within the area outlined to the Left and / or Right to change the value of the adjustment
- Values can be entered directly via the keyboard
- Click on the Colour to open the Choose Colour Box and change the Tone
- Drag the Amount Slider to the Left to Decrease the Effect
Negative
en-us/11.0/temp.1574625717.txt.gz · Last modified: 2022/12/18 11:20 (external edit)
Except where otherwise noted, content on this wiki is licensed under the following license: CC Attribution-Noncommercial-Share Alike 4.0 International


